
How do you fix a damaged decorative plaster fireplace surround? How can you address chipped tiles without replacing them? My faux walls are dinged, but I don’t want to re-paint the entire room – what do I do? I drilled holes in the wrong place on my new cabinets – what now?! I want to address water damage without re-doing my entire room, is that possible?
These are all questions I have recently been able to answer with paint!
The first example is a fireplace surround in a Newton home that was originally crafted in decorative plaster. The effect is fantastic, but unfortunately over the years, the plaster had chipped in many places – in addition to getting slathered in some sloppy painting. What was once an elegant look had become an eyesore in the room. To get this back to its original look, a contractor partner called me in!
After filling in the holes, I was on to my favorite part – mixing paint to match! Each tile has multiple colors that make up the mottled pattern, and in each the colors are different than the next! Toaddress this, I treated each tile like its own little painting. Along the edges, I needed also re-create grout to cover the white wall paint that overlapped on to the tiles. There were damaged areas in many places, but below are a couple of before and after examples.


The second example was a smaller fix to help complete a kitchen remodel. While the counter top and cabinets were being replaced, the homeowner wanted to keep the original tile. This would have been no problem – but there were chips that presented a challenge to the contractor because the tile is no longer available and therefore impossible to replace!
However, with some plaster and some careful color-matching, I was able to make the problem go away:

The next example is something I have done a number of times – touching up existing faux finishes! In this client’s home, their entry foyer, stairway and upstairs hallway were all done in the same faux finish. Overall, the paint was in decent shape, but after about 10 years of use, there were dings and wear marks. Additionally, there was a finished basement that was done entirely in a different faux finish that had a good amount of chips and dings after many years of being the teenager hang-out space. Rather than re-paint all of these spaces, my client decided to save time and money and have me patch all of these spots by matching the faux finish in both rooms! I forgot to take “before” pictures of the entry/stairwell space, but below is just one example of the many chips I needed to make disappear in the basement:

Another service I have provided a number of times is touching up newly installed kitchen cabinets. Sometimes cabinets are delivered with small dings, or sometimes during installation there can be some damage --- and sometimes, the holes are drilled in the wrong place!
Obviously with cabinets, I don’t need to worry about replicating patterns or complicated detail – but matching the color and finish exactly is essential! Here are a couple of recent examples where I have helped make the new cabinet owners happy by making damage go away:


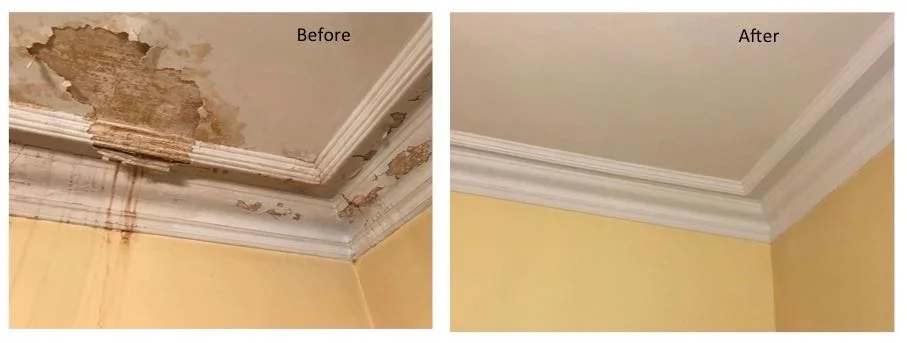
The final example was some water damage in an 1859 home in Boston. The damage was an eyesore to say the least – but my client couldn’t get a quote to fix just that area (without re-doing the entire room). Doing this was a challenge, as the paint color and finish for the ceiling, trim and wall all needed to match up – but the end result was one of the most dramatic before and after paint fixes I have done!
Enjoy,
Jason