
I thoroughly enjoy unique painting challenges, and my client Pam recently presented one to me in the form of an antique Italian painted chair.
The chair is part of a set that Pam loves, but this particular chair was significantly damaged. Covering the wood frame is a thin layer of plaster that features fantastic decorative painting on all of the forward-facing surfaces. Over the years, the chair has developed a great patina that Pam very much likes, but unfortunately the years have also caused a good amount of the plaster (and as a result, the beautiful decorative painting) to chip off. With the large chunks of old, dark wood interrupting the ivory colored chair and decorations, the effect degraded the charm of the patina to make the chair look damaged. Below is one shot of the chair before I started working on it:

One of my biggest concerns was the fragility of much of the plaster that was still in tact – in fact, large chips came off just when we picked the chair up. To address this, my first step was to actually chip off all of the loose pieces I could find and then glue them back down. This gave me a more stable starting point.
After cleaning, sanding and priming the bare spots, I then proceeded to mix paints to match the background ivory color. With many years of wear and sun exposure, different parts of the chair were actually very different colors of ivory – so I ended up mixing 4 different base colors. I then applied these and in some cases did more mixing to make the break between the “old” color and the “new” color imperceptible. To really tie these painted sections in with the original surfaces, I then used 2 different glaze colors that I strategically wiped into the surface to match the patina color and patterns from the wear on the old sections of the chair.
With this done, it was on to the decorative patterns. In most cases, I was able to find the design that belonged in the blank section from another area on the chair. In other cases, there was no design to work with, so I had to make my best guess to interpret what should be in the missing areas. Like with the ivory background, I also needed to be sure to match all of the original colors!
The project ended up being a fun challenge – but most importantly, Pam was thrilled with the result.
Following are a number of “before” and “After” shots showing different sections of the chair. Enjoy!

Before
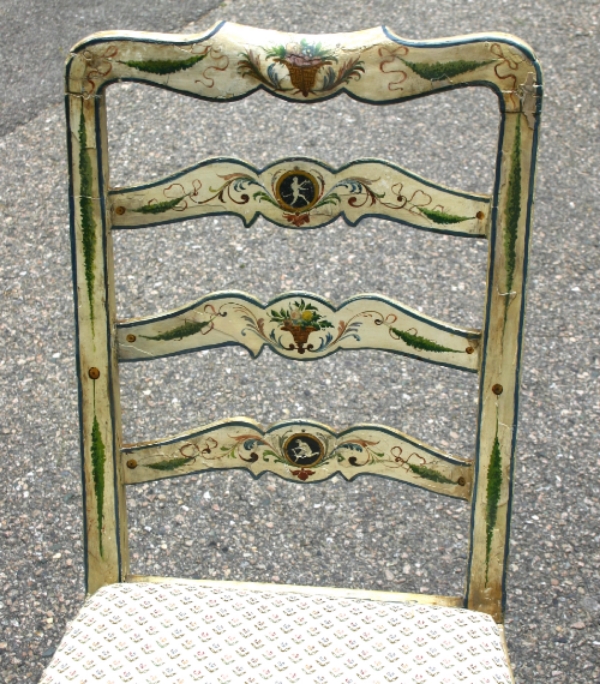
After

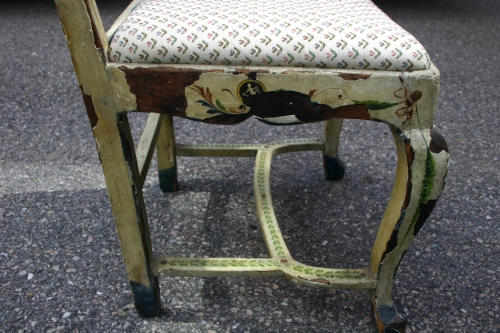
Before

After
Before
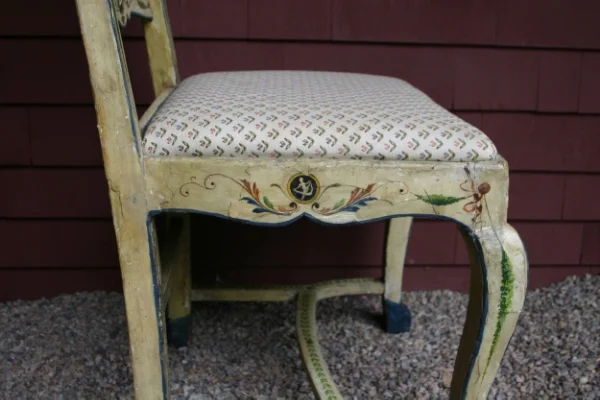
After

Before
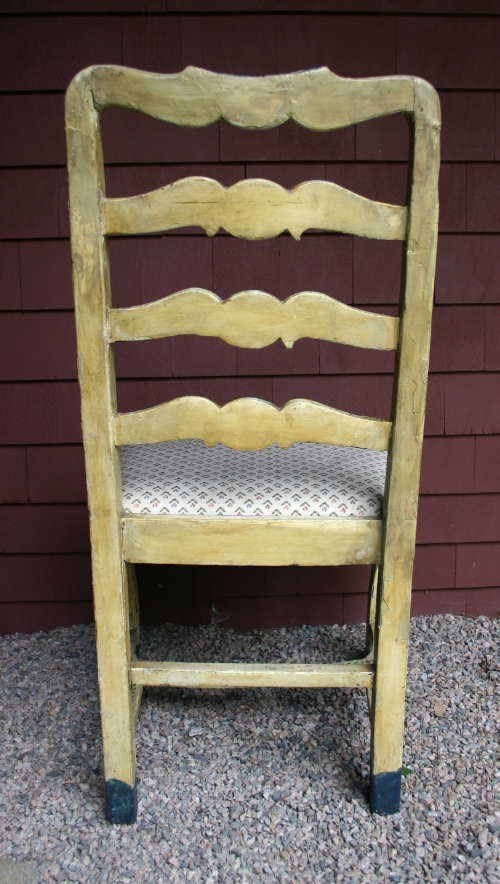
After